Previous Story
How To Modify Your Channel Lock Pliers
Posted On 28 Aug 2014
Comment: 0
Modification of the channel lock pliers will assist in cutting down on multiple tools in your pocket. In a previous article, I wrote about the five tools for your pocket toolbox. The 5 tools for your pocket tool box are: modified channel lock pliers, the multi-purpose tool, a 6-in-1 screwdriver, a pocket knife and wire cutters. We will discuss how to make the modified channel lock pliers here.
Once you modify your pliers you will always have a key tool for through-the-lock forcible entry without adding another tool to your pocket.
There are 6 easy steps to creating your own key tool with your channel locks.
#1 – Purchase Medium-sized Channel Lock Type Pliers
Purchase an inexpensive set of channel lock type pliers. The reason why you purchase an inexpensive set is in case you lose it, you are not out a lot of money.
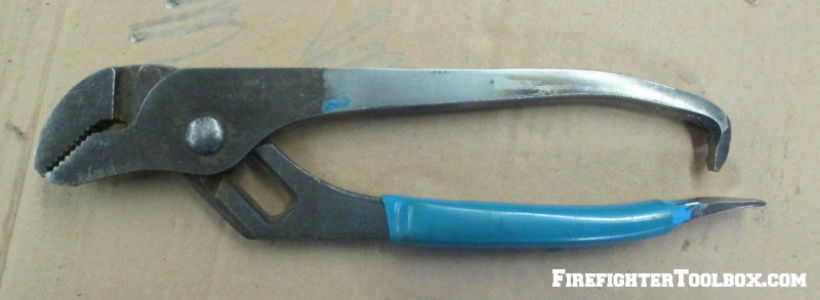
Start with inexpensive pliers.
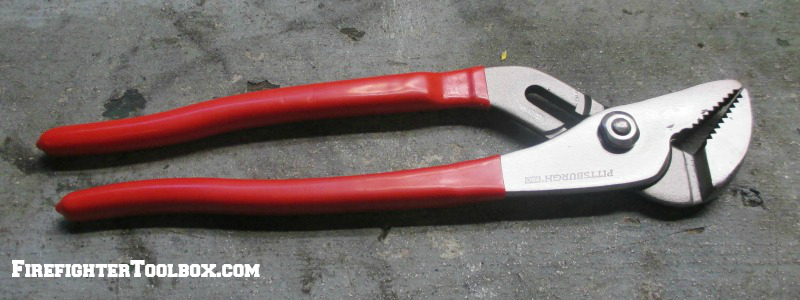
#2 – Cut The Rubber Grips Off Of The Handle
Use a sharp box cutter knife or your pocket knife to cut the rubberized grip off of the handle of the pliers. Be sure to remove the entire grip. If you don’t remove the entire grip, when you heat the handle, the rubberized grip will melt. You may need to wire wheel the metal to ensure that the rubberized coating is completely removed.
Remove the rubber grips from the handles.
#3 – Heat The Secured Handle End
Safety Note: Be sure to wear firefighting gloves when handling the heated metal pliers. Even though you are heating the end, the heat will transfer to the rest of the tool via conduction.
Place the handle of the grip that would rest against the palm of your hand into a table vise, leaving the end of the handle exposed in order to properly heat and bend it.
You can use a plumber’s torch to get the end of the handle cherry red; this will be hot enough to make the metal bendable.
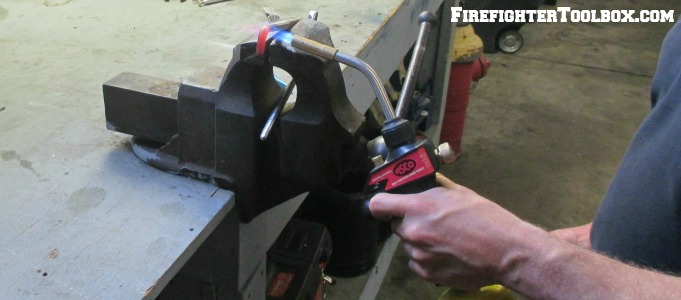
Place the pliers in a vise and heat the end until it is cherry red.
#4 – Make The Bend
Use a second set of pliers to bend about 1/2″ (one-half inch) of the pliers handle end to face 90 degrees inward toward the other handle of the pliers. This will give you enough metal to work with to shape the end, yet you will still be able to close the pliers when gripping an object. Once you are happy with the bend, place the bent section into water to cool the metal and to strengthen the bend.
Be sure to use your firefighting gloves when handling the heated tool as the tool will remain hot for a while.
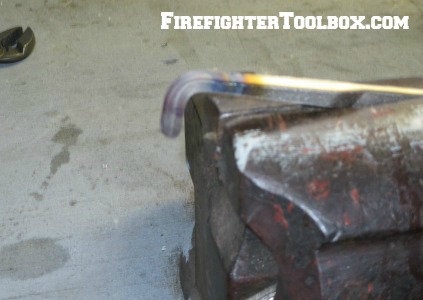
Bend the handle inward.
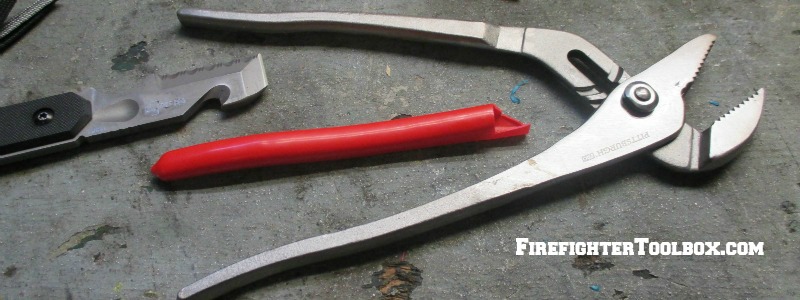
#5 – Grinding To Fabricate A Key Tool
Safety Note: When grinding and using the wire wheel, be sure to use eye protection and to wear gloves to prevent injuries.
When the pliers are cool enough, begin with grinding the non-bent end of the pliers to create a flat head screwdriver. Use a flathead screwdriver as a guide to what you are trying to form. When it is complete and you are satisfied with your screwdriver end, use the wire wheel to remove any rough and sharp edges.
Then you can begin to grind the bent end of the pliers into a triangular shape. Use the K-Tool’s Key Tool as a guide. Try to make the bent end of the pliers look similar to the triangular end of the key tool. When you it is complete and you are satisfied with your new key tool end, use the wire wheel to remove any rough and sharp edges.
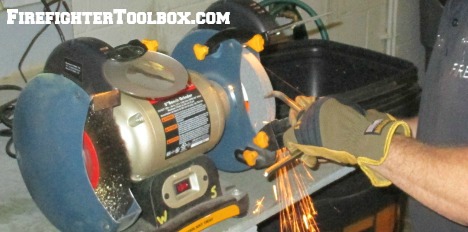
Shape the ends appropriately with a grinder then finish with the wire wheel.
#6 – Practice Practice Practice
When you have the opportunity to train in through-the-lock techniques on a pivoting deadbolt type lock, use the new tool that you created.
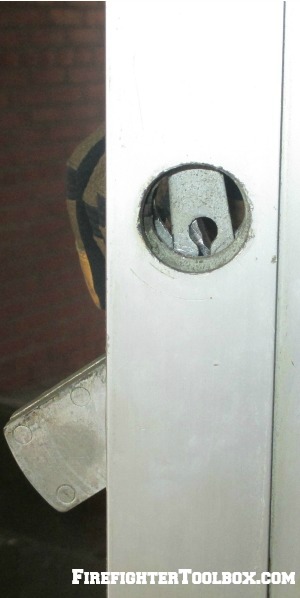
Pivoting deadbolt lock.
To unlock and lock a pivoting deadbolt type lock, push down on the spring loaded piece of metal called the pin. Move the key tool from the 5 o’clock to the 7 o’clock position then vice versa. This will lock and unlock the deadbolt.
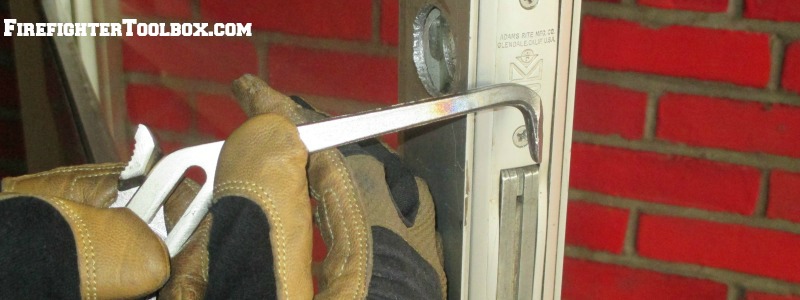
Use the bent end of the pliers.
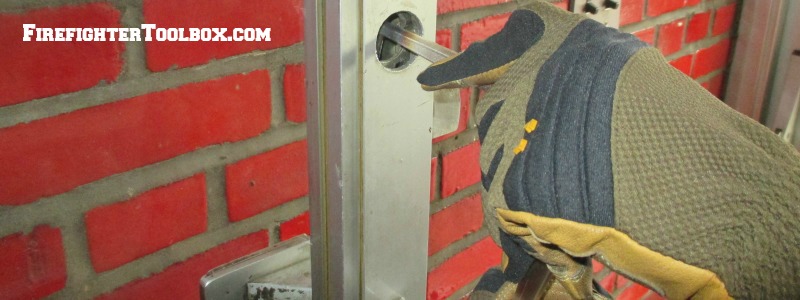
Push down the pin mechanism.
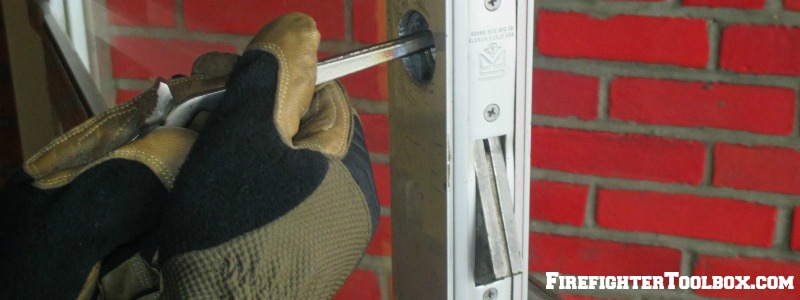
Rotate the tool from 5 o’clock to 7 o’clock (or vice versa) to unlock the deadbolt.
Practice this technique over and over again so it becomes muscle memory. Use the key tool as well to lock and unlock the deadbolt so you are familiar with both tools.
Let me know in the comments how your modified pliers came out.
Stay safe.
Photos courtesy of John Hayowyk, Jr.