Previous Story
Fundamentals of Fire Service Elevator Operations Part 2
Fire Service Elevator Phase 2 Operations
In the previous article, we discussed how to operate Phase 1 of the Fire Service Elevator Controls. Now we will discuss how to use Phase 2 of the Fire Service Elevator Controls.
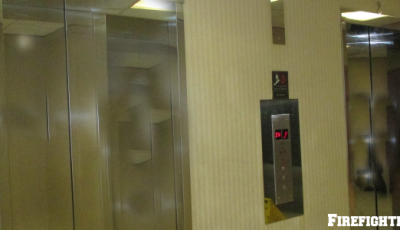
Phase 2 Fire Service Control
- ON” (Fire Service Mode)
- “OFF” (Normal Operation)
- “HOLD” (Keeps the car on that floor).

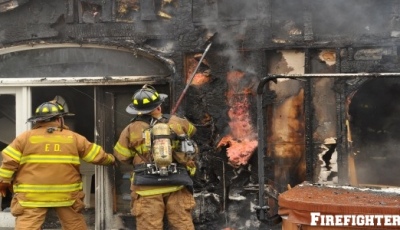
Prior to entering the elevator car, ensure that all members are in full PPE with SCBA’s turned on and ready to don the face pierce in case smoke is encountered when the elevator door opens. It is recommended that only 4 to 6 firefighters occupy the elevator car. There is no need to over load the elevator car. The car can make multiple trips to get manpower and equipment up to the stage area floor. A fully equipped firefighter with a radio should be used as the Elevator Control Person to shuttle members and equipment.
In order to close the elevator car door the Door Close button must be pressed until the door is fully closed. Failure to hold the door close button until the door is fully closed will result in the elevator door opening automatically.
Floor selection for where the elevator car should stop should be 2 floors below lowest alarm or report of fire or smoke. The elevator should NEVER be brought up the floor of alarm activation. In April of 2014, 2 NYPD officers responded to a fire in a building and took the elevator to the fire floor. Upon exiting the elevator they were overcome by smoke. One officer passed away from smoke and heat and 1 was severely injured. The injured officer spent nearly 2 months in the hospital recovering from injuries sustained from the fire.
When traveling up in the elevator car, stop every 5 floors to perform a safety check. Members should look up and down the shaft way for any signs of smoke or fire. If smoke or fire are present immediately exit the elevator, advise Command of the situation and continue up using the stairs. If there is water raining down the elevator shaft or if the elevator car begins to act erratically get out at the next floor by pressing the Call Cancel Button. Place the car out of service and continue up using the stairs and notify Command.
The Call Cancel Button will cancel the last requested floor that was pressed after we took control of the elevator. The elevator car will stop at the next level after the call cancel button was depressed. The door will not open automatically. The car operator must hold the Door Open Button down until the door open fully. If the Door Open Button is released prior to the door fully opening the car doors will automatically close. A test of the Call Cancel Button should be performed on the car that has started to move to ensure that it is operating properly.
Upon reaching the floor of your choice announce the floor name/number over the radio to command. If arriving on a floor and smoke is present immediately don your face piece, close the elevator car door and drop down 2 floors then go to work.
The elevator car can be held on the floor by turning the key to the HOLD position. This feature can be used for EMS incidents as discussed in a pervious article or if the elevator car needs to be placed out of service due to smoke, fire, water or acting erratically. This was discussed earlier in this article.
Have the elevator car which is being controlled by the Elevator Control FF return to the lobby area to begin shuttling manpower and equipment to the designated floor during the fire operations.
Elevator Reset
Once the incident is completed members can reset the elevator car from Phase 2 by turning the key to the OFF position. Once the elevator is at the lobby area the key should be removed from the Phase 2 controls in the car and inserted into the Fire Service Elevator control in the lobby or designated recall floor and turned to the RESET position then the off position and the key can be removed.
It is imperative that we practice using the Phase 1 and Phase 2 Fire Service controls. This practice will make operations easier than we respond for an incident.
Stay Safe.
Photo Courtesy John Haywoyk