
Previous Story
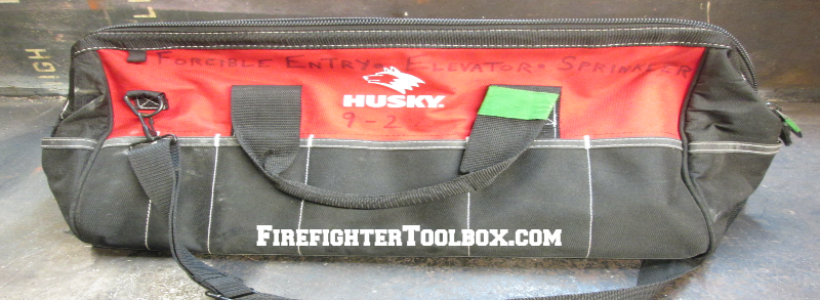
How To Build A Forcible Entry Bag – Part 2
Having a forcible entry bag on each rig makes it possible for one firefighter to easily carry all the tools (including the irons) necessary to open nearly every common type of door and lock in his or her district.
Let’s dive in and talk about tools.
Disclaimer
Allow me to say at the outset that there are numerous lock-pulling tools and striking tools, and dozens of possible combinations of these tools. Time and space considerations prevent us from listing them all here. But suffice it to say that the tools I am going to recommend are not the only tools that are available, or the only tools that will work. You may find that another particular tool or combination works better for you or your department based on your district or your running orders.
What I will discuss first here in this article are my own recommendations for building a forcible entry bag “from scratch,” as if your department had no lock-pulling tools at all. If your department already owns an older, first-generation lock-pulling tool — say, the K-Tool or the Truckman’s Tool — then consider making that tool the primary tool in your forcible entry bag, at least for now. I’ll give you my from scratch recommendations, then list a few alternative combinations that may suit your running orders or existing tool complement.
#1 – Lock-Puller
My own preference for a lock-pulling tool is a relatively new version of the Rex Tool called THE S&D REX, made by Fire Hooks Unlimited. I’m intimately familiar with the S&D Rex because the training company that I co-own, Search & Destroy Fire Training, commissioned the first one to be made. We use them in all of our through-the-lock training classes, and I’ve used it quite a bit in the field against real doors and locks.
My partner Scott Gardner and I both love the head of the standard Rex Tool for pulling rim and mortise locks and for removing knobs off of key-in-knob locks. But we spent the first ten years of our respective careers pulling locks with another tool made by the same company called the Truckman’s Tool because our department didn’t carry Rexes. In that time, we came to appreciate the slender head of the Truckman’s Tool, how easily it could be set behind a tubular deadbolt, and how it makes an effective Plan B for pulling the entire lock if a knob-only removal has failed.
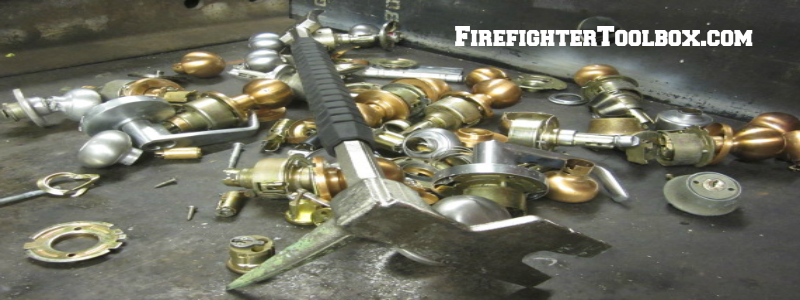
I contacted Bob Farrell, CEO of Fire Hooks Unlimited, and asked him to take one of his standard Rex Tools, lop the chisel-end off, and weld the head of a Truckman’s Tool in its place. What he sent me was an 18” long, double-headed tool. Using one head or the other, the S&D Rex can pull most any type of common door lock found on a residential home, apartment, or commercial building. Bob liked the idea enough that he made it part of his regular catalog and let us name it. Scott and I are pretty proud of that.
Let me say quickly, however, that we didn’t “invent” the tool. We receive no royalties or percentage based on its sale. So we have no vested interest in anyone purchasing it, beyond the desire to share something that we think is the most versatile lock-puller around.
#2 – Striking Tool
For most operations, the lock-puller will need to be struck in order to be set into or behind the cylinder or lock-face.
Certainly a flat-headed axe can be used to strike the lock-puller, but it’s typically easier for one person to perform the full operation, and a short hammer or hand-sledge is less cumbersome and more precise than a full-size 6-pound or 8-pound axe.
I’ve found that an inexpensive 2-pound drilling hammer, a 3- or 4-pound engineer’s hammer, or even a 22-ounce framing hammer will more than do the job of setting the lock-puller in place.
#3 – Key Tools
Through-the-lock is typically performed in two distinct phases, lock-face removal and latch manipulation. Once you’ve pulled the cylinder, you’ll need a small tool to manipulate the mechanism and retract the latch from the strike, thus unlocking the door. Different types of locks require different “key tools.”
The most versatile is the Standard Key Tool, which will often come as part of a set when purchasing a Rex Tool or K-Tool.
This tool has two ends. One end is flat, and tapers down to a flat-head screwdriver shape. The other end is bent at a 90-degree angle. The flat-end is good for manipulating the latch-hubs of most key-in-knob locks and rim locks. The bent-end is used when retracting the latch on mortise locks.
While the Standard Key Tool will fit most latch-hubs, they are a little too wide to insert into the neck of certain key-in-knob locks. For working in close quarters, I prefer either a 3/16” or 1/4” flat-headed screwdriver.
After pulling just the knob-portion of a key-in-knob lock, depending upon the make and model, you may be looking at a small piece of flat steel inside the neck of the lock-set where the knob or lever used to be. This piece of flat steel is the locking spindle, and it must be rotated 90° degrees in order to unlock the door. The easiest way to do this is with a small or medium size pair of needle-nose pliers.
Keeping Key Tools Together
To prevent these three tools from getting lost, the way they so often do, I drilled a hole in each and connected them together with a cheap carabiner. Next, I attached a split-ring to the S&D Rex using small hose-clamp so that the key tool set can be clipped directly to the lock-puller. It’s a fifty-cent solution to the twenty-dollar problem of losing your key tools.
Photos courtesy of Sean Wilson.


Love this article, please write more articles like this making our jobs easier