Previous Story
How To Build A Forcible Entry Bag – Part 3
We’ve talked about 3 tools for the forcible entry bag so far: a lock-puller, a striking tool, and key tools. Here are 6 more.
#4 – Pliers
A 10-12” pair of vise-grips (locking pliers) or channel-locks (tongue-and-groove pliers) is useful for spinning out the cylinder on Adams-Rite mortise locks. Found on glass-storefront doors all across America, the cylinder on these locks is held in place by a small carbide set screw. Using vise-grips or channel-locks to grip the face of the cylinder, it can sometimes be unscrewed, breaking the set screw in the process.
My own personal preference is to carry vise-grips, because they are good at keeping a grip on the cylinder-face. But a good many firefighters have modified their channel-locks so that the handles are ground to form a screwdriver tip and a bent-end tip to act as a built-in key-tool for manipulating latch-mechanisms.
#5 – Shove Knife
Using a shove-knife to “loid the latch” is akin to using a credit card for the same purpose, namely, pushing the latch in temporarily to clear it from the strike-plate. It’s a method that is minimally destructive, and allows the door to be immediately re-secured. Although it won’t work on every door or lockset, it’s a method that, with a little understanding and practice, can work quickly.
#6 – Wood Chisel
If you are assigned to an older area where wood-frame double-hung windows are common, a 1/2” or 5/8” wood chisel can often be tapped upward between the sashes with a hammer or other light striking tool until they contact the sash-lock. This will drive the screws holding the sash-lock out of the wood, or separate the two halves of the lock so that they no longer secure the window.
This method will not work on most vinyl double-hung or slider windows (as there is a small lip covering the seam between sashes), but the smaller head on the S&D Rex or the adz of a halligan can be inserted between the sashes and rocked slowly from side-to-side. This will often distort the sash enough to separate the two halves of the sash-lock without damage.
#7 Small Flashlight
A small, inexpensive flashlight can be indispensable when trying to see into the innards of a lock you just pulled. Seeing what you’re up against will help you with your selection of key-tool, and will tell you what you need to do with it. Something small enough to stick in your mouth so that you can work with both hands is best.
In our bag, I threw in a couple (brand new) disposable penlights with a rubber band wrapped around them. Roll the rubber band down over the switch, and it will stay lit without having to hold it in your hand.
#8 – Safety Glasses
Occasionally when pulling a lock, some part of it will come flying off at high speed, so it’s not a bad idea to have the face shield down on your helmet and/or a pair of safety glasses on.
#9 – Specialty & Ancillary Tools
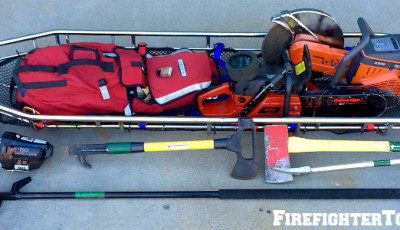
This bag is the perfect place for specialty tools like elevator keys, sprinkler wedges or tongs, water keys, or other small tools specific to your district. Very often certain types of technical calls will require forcible entry into locked mechanical or fire equipment rooms.
It’s also not a bad idea to throw in a couple door wedges, an adjustable wrench, and a couple additional screwdrivers of common sizes. These tools help to round the bag out, and make it an easy and perfect grab not just for locked-door medicals and automatic fire alarms, but also for sprinkler-head calls, elevator malfunctions or rescues.
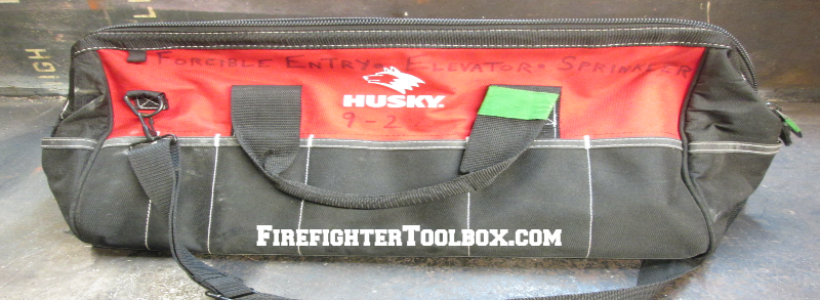
The Tool Bag
One thing we haven’t discussed yet is what exactly we are going to put all these tools into. My best advice is simply not to overthink it. Unless you’re planning on carrying a lot more than what I’ve listed here, an 18” tool bag that costs $20 from Lowes or Home Depot will do just fine.

A simple tool bag, such as this one, will work fine.
Photos courtesy of Sean Wilson.